|
How to photograph mountain
biking like a PRO
A beginner's guide to shooting better
action shots: learn the camera skills and cycling photography techniques
that will give you professional-looking photos.
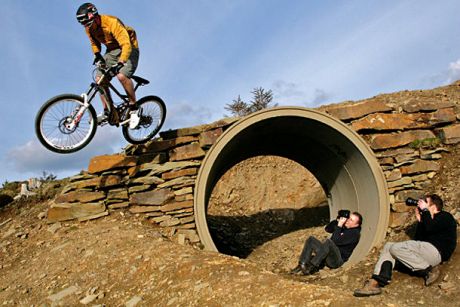
Mountain biking is a seriously
photogenic sport. The sweat, the mud, the speed� it's a great way to hone
your action photography skills and to try out creative camera techniques
like zoom-bursts and slow-sync flash. Best of all, unlike many sports, you
can get in close with your camera. You don't need big, heavy telephoto
lenses � a camera kit lens can give you lots of creative options. Whether
you visit one of the UK�s growing list of purpose-built trail centres or
simply turn up at a race venue, there�s no shortage of mountain bike riders
willing to show off their skills in front of the camera. Follow our tips
below to do them justice!
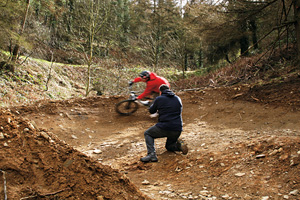
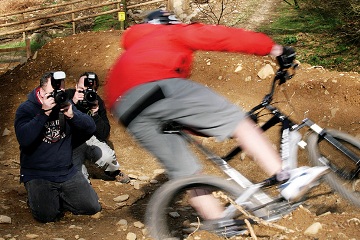
1. Use the right camera and lenses
The great thing about mountain
biking from a photographer�s point of view is that, unlike a lot of sports,
it�s possible to get up close to where all the action is happening. And with
a choice of viewpoints, often right up to within inches of riders whizzing
past, there�s no need for a bag of fancy lenses to get great shots. All you
need is your camera body and a standard zoom, covering wide angle to short
telephoto. A lens in the 24-105mm range can be perfect for the job.
If you want to increase your
options, adding an ultra-wide zoom is a good bet for dramatic angles and a
rider�s eye-view of the action. Look at a lens in the 10-20mm or 12-24mm
range.
The other piece of kit that
should be in any cycling photographer�s bag is a flashgun. A touch of
fill-in flash is useful for blending sharpness and blur in slow
shutter-speed shots, and essential if you find yourself deep in the woods
where the only available light is likely to be too poor to allow you to
freeze the action.
2. Use the simplest camera settings
Cross-country mountain biking is
slower moving than many sports and riders generally follow the same path; so
there�s often time to use Manual camera settings to ensure consistent
results. Here, we give you a foolproof guide to the settings that will bag
you the best shots every time.
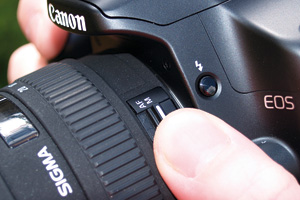
Focus mode A bike and rider shot
is full of holes that can fool the camera into focusing on the background.
So pre-focus on a spot where the action will happen and lock the lens by
switching to manual focus.
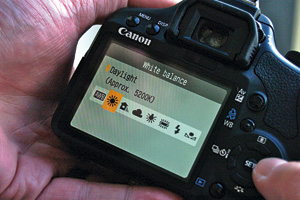
White Balance Use a preset White
Balance to prevent changes in colour and lighting, which may affect the
overall tone of your pictures. The Daylight option is best and will make
batch processing of a sequence of shots easier.
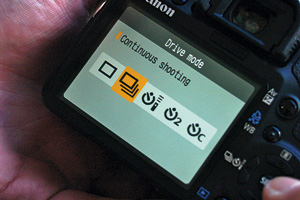
Drive mode It�s more effective
to plan your photos and take a well-timed single shot instead of a sequence.
However, keep the camera set to the fastest continuous frame rate so you
don�t end up missing a great action moment.
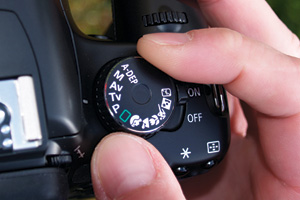
Exposure mode Shutter speed is
the most important exposure variable in action photography, so stick with
Shutter Priority (sometimes indicated by 'Tv' on the camera's mode dial) if
you want the camera to handle exposure for you, or go with Manual for more
control.
3. Choose the best shutter speed
Selecting the right shutter
speed is crucial with mountain bike photography. Although top pro riders
move at speeds most of us would never reach on a bike, the speeds are much
lower than motorsports. Don�t try to always freeze the action otherwise it
can look as though the riders are standing still. Here are some suggested
settings to use as a starting point, although the result will depend on the
light level, the speed of the cyclist and your panning skills (see below).
- 1/250 sec: at this shutter
speed, there is likely to be some movement, but it may not be enough to make
it look as though the rider�s going very fast.
- 1/60 sec: at this setting, the
background may start taking on a smooth blur, but there should still be
plenty of detail in the bike and rider.
- 1/30 sec: it will be hard to
hold sharp details on the subject at this shutter speed. It's useful for
creative effects but too slow for general use.
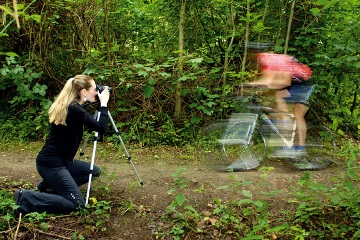
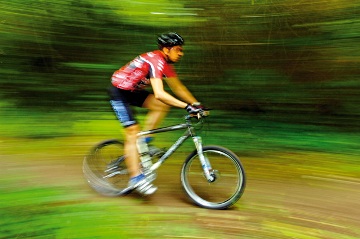
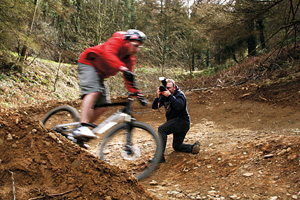
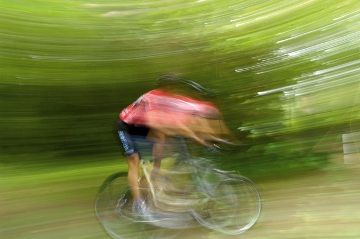
4. Pan with the action
To give your mountain biking
photos that all-important sense of speed, you�ll need to practice your
panning technique. The idea is that you move the camera to follow the rider,
so that they remain in the same position in the frame as you take the
picture. They�ll then be rendered sharp, while the moving background becomes
a blur. If the rider�s head is sharp, the rest of the shot can be a blurred
mess and you�ll get away with it.
To keep a rider�s head sharp
it�ll need to appear stationary during the pan. Think of your viewfinder
focus points as imaginary gun-sights. Pick one that allows a suitable
composition and follow the rider�s head with it. Switch off continuous focus
and instead manually pre-focus on where the rider�s face will be.
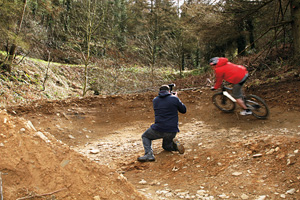
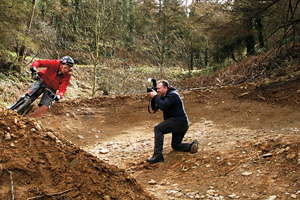
Get comfortable
Plan where you want to take the
shot and make sure you�re comfortably standing, kneeling or sitting with
your body facing where the rider will be, your legs spaced apart for balance
and the camera pre-focused.
Stay sharp
Using the focus points in your
viewfinder as an imaginary gun sight, choose the one that�s closest to where
you want the rider�s head to be in the composition and hold it over their
head as they ride past.
Be gentle!
Squeeze the shutter gently while
the rider�s head is still covered by your pre-selected focus point. Never
jab or put pressure on the shutter as you�ll create vertical movement,
spoiling the panning effect.
Follow through
Follow through with the focus
point still over the rider�s head until well after the shot�s been taken.
This is important because it ensures you�re fluidly moving the camera at the
correct speed and direction.
Top panning tips
- You need a clear view of your
subject � if you�re shooting a race, get there early so you can grab a prime
spot.
- Choose a spot where your
subject will be moving across your path so you can achieve a smooth pan.
- Although panning will play
down cluttered backgrounds, try to avoid things like advertising hoardings
that may still look distracting. Grass and tarmac are ideal.
- High vantage points can work
well, allowing you to look down on your subject. Corners in tracks are also
good panning spots as your subject won�t be moving so fast.
- Use your lens set to
continuous AF mode if you don�t feel your manual focusing is good enough �
and select the right AF sensor so the lens keeps focus on your subject
rather than the background!
Common panning mistakes
It�s tricky to get panning right
and easy to get it wrong. Successful panning is all about control and
confidence. If you feel you can do it, you can, whereas if you�re unsure
you�ll keep making mistakes � panning the camera too quickly, firing the
shutter either too early or too late. You�re bound to make mistakes to begin
with, but instead of breaking out in a sweat when you do, learn from the
experience and try again � eventually you�ll nail it. Here are some common
mistakes to avoid:
Problem:
The panning action was uneven so the subject is very blurred. This shot
actually looks quite effective in its own right, but as an example of
panning isn�t great.
Solution:
Match the speed of your camera movement to the speed of the bike.
Problem:
In this case the pan was all over the place � you can tell from the shape of
the streaks in the cyclist and background that the camera was panned upwards
as it travelled right to left.
Solution:
Keep the pan smooth and don't jerk the camera as you press the shutter
button and release it.
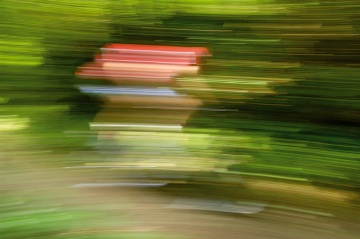
Problem:
Ooops! Panning doesn�t get much
worse than this. The shutter speed was far too slow and the pan wasn�t even
so the subject is a mere smudge. Must try harder!
Solution:
Pick a shutter speed fast enough to provide some detail.
5. Use Flash to Freeze the action
A burst of flash is brief enough
to freeze the fastest movement, so why not use an external flashgun to
create perfect slow-sync action shots? This technique combines a slow
shutter speed with a burst of flash � the slow shutter records blur while
the flash captures a sharp image of a cyclist on the same frame.
Many flashguns and digital
cameras with pop-flashes have a slow-sync flash setting. This ensures that
the camera doesn�t automatically set the correct flash sync speed but
instead sets a shutter speed to correctly expose the ambient light. The
shutter speed you want depends on how fast your subject is moving, what
ambient light levels are like and how much blur you want.
One other factor to consider is
whether to shoot on first-curtain sync, where the flash fires at the start
of the exposure, or second-curtain sync where flash fires at the end.
If you don�t intend to get lots
of blur in the picture, first-curtain sync will be fine because you know
that the flash will fire when you hit the shutter button so you can time
your picture accordingly. However, if you want to record a lot of blur,
second-curtain sync (aka rear curtain sync) works better � you get the blur
appearing behind the frozen image, not in front of it, which looks more
natural. Timing the shot for the peak of the action is more difficult
though, as the viewfinder will black out while the exposure is being made.
When it comes to taking the
picture, track the bike as if you were taking a panned shot, so the
background blurs, and hit the shutter when it�s in the right position. If
your camera is set to predictive/continuous autofocus mode it should keep
the subject sharply focused. Alternatively, in low light, switch to manual
focus, pre-focus on a spot where you intend to fire the shutter, then track
your subject towards it.

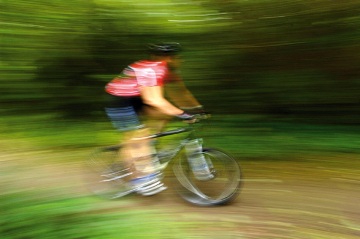
6. Get creative with zoom bursts
A classic technique for adding
motion effects. In a nutshell, all you do is zoom the lens through its focal
length range, from longest to shortest or vice versa, while taking the
picture. Result? Your subject records as a series of colourful streaks that
appear to explode out from the centre of the image. The subject doesn�t even
need to be moving as the zooming action itself introduces motion.
If you do attempt to zoom a
moving cyclist, start off with them coming towards the camera. For bikes
moving across your path you�ll need to pan the camera while zooming, which
is trickier.
The key to success is zooming
smoothly through the focal length range so you get even streaks, and also to
set a shutter speed slow enough so you can zoom through the range � anything
faster than 1/8sec will probably be too fast.
Once you've mastered the art of
the simple zoom burst, you can add a flashgun into the mix. This will help
you record a sharp subject (as long as it's within the flash's coverage
area) in the middle of all that blur. Use the slow-sync flash setting to
ensure the shutter stays open long enough to record the zoom burst.
7. Improve your composition
It�s all too easy, when you�re
in the thick of the action to forget that great bike pictures aren�t just
about capturing a sharp image. Shot after shot of riders in the middle of
the frame may give an accurate record of, say, a race or event, but a little
extra care will lift them out of the ordinary.
There�s no secret to making your
mountain bike pics stand out from the crowd and that�s where great
composition can help. It�s something that photographers take great care over
when faced with a stunning landscape, for instance, but which all too easily
goes out of the window with a moving subject. Plan your bike shots in
advance, take the subject away from the centre of the frame, use natural
trail features to lead the eye in and out of the picture, and, by doing
this, create something a little different.
Peak of the action
Whether it�s the moment a rider
leaves the ground from a jump, or the sideways swing of their handlebar as
they sprint up a tough climb, there�s almost always an ideal moment for the
shot. Try to anticipate it and squeeze the shutter release just before that
point. A D-SLR�s mirror blacks out your view at the point of exposure, so if
you see the shot in the viewfinder� you�ve missed it!
Lead-in lines
Most mountain biking takes place
on well-defined trails. These make perfect lead-in lines to draw the eye
into the picture. When you can�t get close enough to fill the frame with the
rider, try using the trail. The first shot with the rider centred in the
frame works okay, but it�s a far more powerful picture when the rider�s
positioned off-centre in the top third of the frame.
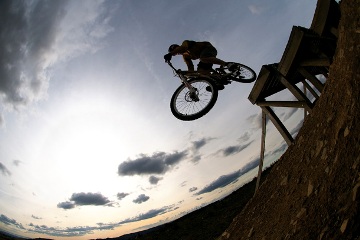
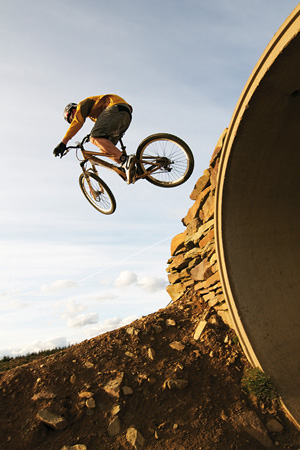
Shoot in context
Close-cropped action shots can
be very effective, but sometimes it�s helpful to include some context to
show where the rider�s come from� and where they�re going. With a low
viewpoint, wide lens and fast shutter speed, this silhouette of pro rider
Chris Smith launching a drop has loads of impact.
Thanks to: Seb Rogers, Chris
Smith, Ben Birchall, Andrea Thompson and the team at Cwmcarn near Newport in
South Wales, one of the country�s best-established and most popular trail
centres.
Source: PhotoRadar.com
Click here for to visit the Article Source
Posted By: Diesel
Date: 02/20/2010 |